JavaScript and the Brackets Shell Environment
 This is the second post in my series on using the amazing bracket-shell project for building native desktop applications with HTML and JavaScript.
- Post 1 – Build Native Desktop Apps with Brackets Shell
- Post 2 – JavaScript and the Brackets Shell Environment
At this point you should have brackets-shell compiling/building with your own HTML app bundled inside of it. In this post I want to teach you how to interact with the shell via JavaScript.
Brackets shell has two ways to interact with the native environment via JavaScript. The first is via a set of functions created in native C++/Objective-C and then exposed in Chromium Embedded Framework. The second method is to communicate with the Node.js process via websocket protocol and tell it to run commands on the native environment. This post will take a look at the first method.
The Brackets JavaScript Object
The brackets-shell team has already built several native functions and exposed them via JavaScript to your HTML application. To take a look, run your newly built brackets shell app and open the Chrome DevTools by right clicking anywhere in your app and selecting `Show DevTools`.

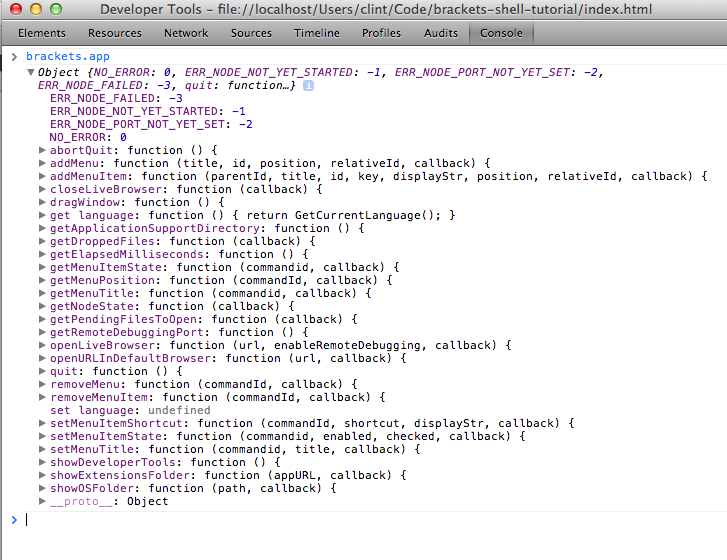
Once in DevTools, click on the console tab furthest to the right. Inside the console type `brackets` and hit enter. The console will echo the contents of that variable, but it will be minimized. Click on the little triangle arrow to the left of the response to expand the contents and you will see an `app` object and a `fs` object. Expand either of those objects to see an entire list of functions that brackets-shell gives you for free to use in your app. The `brackets` variable is injected into the browser via C++ and is available to your code when running in the shell. So cool.
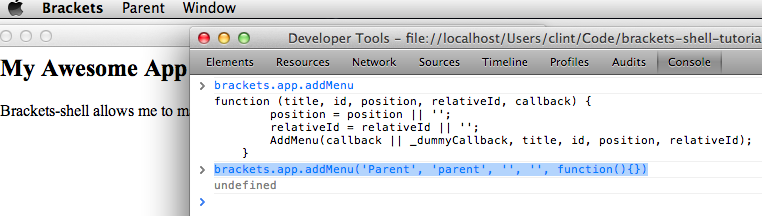
You can see there are some handy functions in there. To test one out, type in `brackets.app.quit()` into the console and your app should quit! Pretty neat that you did it from JavaScript, eh? Now let’s look at another function that doesn’t close your app. Run your app again and show devtools. In brackets.app there is a function called addMenu(). This adds a menu into the toolbar for you to use. Enter this string into the devtools console:
brackets.app.addMenu('Parent', 'parent', '', '', function(){});
The first argument is the string you want displayed for your new parent menu. The second is the ID. You should immediately see a new menu item appear for your app called “Parent”. (in OSX it appears at the top, on windows it appears right in the app itself)
Now let’s add a menu item into that parent menu called ‘My Action’. Enter in the following code in the console:
brackets.app.addMenuItem('parent', 'My Action', 'myaction', '', '', '', '', function(){})
The first argument is the ID of the parent menu you want to put this item in, the second argument is the string you want to display for your item, and the third argument is the ID of the menu item. The other blank strings are for positioning, but aren’t important for this demo.
You should now see your new menu item when you click on `Parent`. Now all we have to do is assign an action handler to the menu item when it is clicked. To catch events as they come in from the shell, you will need to define another object on the brackets variable called `shellAPI`, and within that object you must define a property called `executeCommand` as a function that accepts a string (commandId). The shell looks to see if that function exists and sends all commands to it so you can handle them in your code. For example, if you clicked on your new menu item with the ID `myaction`, the shell would call brackets.shellAPI.executeCommand(‘myaction’)
Instead of doing this in the console, let’s go ahead and add this script right into our index.html file (along with some jQuery for cheating later):
<html>
<head>
<title>Awesome</title>
</head>
<body>

<h2>My Awesome App</h2>
<p>Brackets-shell allows me to make this amazing native app with HTML. WOW!</p>
<script src="http://ajax.googleapis.com/ajax/libs/jquery/1.9.1/jquery.min.js" ></script>
<script>
$(function(){
    brackets.app.addMenu('Parent', 'parent', '', '', function(){});
    brackets.app.addMenuItem('parent', 'My Action', 'myaction', '', '', '', '', function(){})
    brackets.shellAPI = {}
    brackets.shellAPI.executeCommand = function(command) {
        if(command == 'myaction') {
            alert('You definitely clicked on your new menu item!');
        }
    }
})

</script>
</body>
</html>
Now re-open your index.html file in the brackets-shell (if you have DevTools open, and in focus, hit Command-R on mac, or Ctrl-R on windows and your app will refresh with your updated index.html file) Go ahead and click on your new menu item ‘My Action’ and you should see the following alert box pop up:
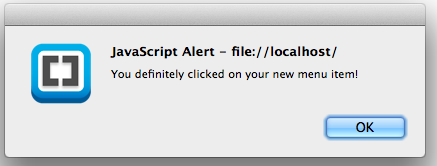
Awesome!
Go ahead and play around with the other functions that brackets makes available to you. Especially the file system commands which really allow you to do some cool stuff. If you have trouble, make sure to check out the detailed comments for each function in the source code.
Adding Custom Native JavaScript Functions
So you want to add your own native functions, eh? If you are brave enough to venture into the dark realms of C++/Objective-C then the world is your oyster with brackets-shell. You can do pretty much anything you want to do. To illustrate, let’s add a function that minimizes the window (overly simple, but a good starting point).
There are three files we will need to change to add custom functions:
- appshell/appshell_extensions_platform.h – This is where we define our new C++ function
- appshell/appshell_extensions_win.cpp (or _mac.mm if you are working with OSX) – Where the actual C++ function is written
- appshell/appshell_extensions.js – This file bridges the C++ function to the JavaScript one
First let’s define our function in appshell_extensions_platform.h
#if defined(OS_WIN)

void MinimizeWindow(CefRefPtr<CefBrowser> browser);

#endif
First we add the #if statement to make sure this function only get’s defined on windows. If we were implementing on both systems, we could remove the if statement completely.
Then we define our function called MinimizeWindow and pass it the main browser object as a parameter.
Now we implement our new function in the appshell_extensions_win.cpp file:
void MinimizeWindow(CefRefPtr<CefBrowser> browser, std::string value){
    CefWindowHandle hWnd = browser->GetHost()->GetWindowHandle();
    ShowWindow(hWnd, "SW_MINIMIZE");
}
Obviously you need some Windows programming experience for this function. Thankfully, I have my co-worker, Jordan, who is excellent at figuring out this stuff, and so I “borrowed” some of his code. 
Lastly, we need to add the function in appshell_extensions.js. We add it right after the DragWindow function (contributed by me and Jordan… yes, shameless, but I love that I got a C++ pull request accepted)
/**
     * Minimize the window
     *
     * @return None. This is an asynchronous call that sends all return information to the callback.
     */
    native function MinimizeWindow();
    appshell.app.minimizeWindow = function () {
        MinimizeWindow();
    };
Save your progress and run your build on Windows. Run your new build and open up DevTools and enter `brackets.app.minimizeWindow()` in the console and your window should minimize! With JavaScript!!! Excellent.
Some other things we have added to brackets-shell at my company are:
- – Removing the window frame
- – Adding transparency and rounded corners
- – Adding tray icons
- – Customizing popup windows
We will get these pieces cleaned up and added to a forked repo for all to enjoy soon.
Good luck with your native app adventures! Hit me up with any questions or comments you might have. There are more posts to come!